Setting up your automation instance
This page is the short map for after you create a SpliceRun account. Pick your lane, then follow the right guide. Nothing here invents a SLA or a credential email that the product does not send.
Three lanes
| Lane | Who owns the server | Before you pay | After you pay |
|---|---|---|---|
| Shared | SpliceRun | A SpliceRun account | Wait for provision; open the app; you create the first admin user |
| Dedicated | SpliceRun (we rent the VPS) | Account + a domain you control (recommended) | We provision the box; you point DNS and claim the app owner |
| Bring your own server | You | VPS + domain, with DNS already pointing at it | We give you an SSH key to install, then preflight and install the stack |
If you are still choosing a lane, start with Choosing a plan and What we manage.
Shared (we host it)
- Sign in at app.splicerun.com and open Deploy.
- Pick Shared, the size you want, and complete payment.
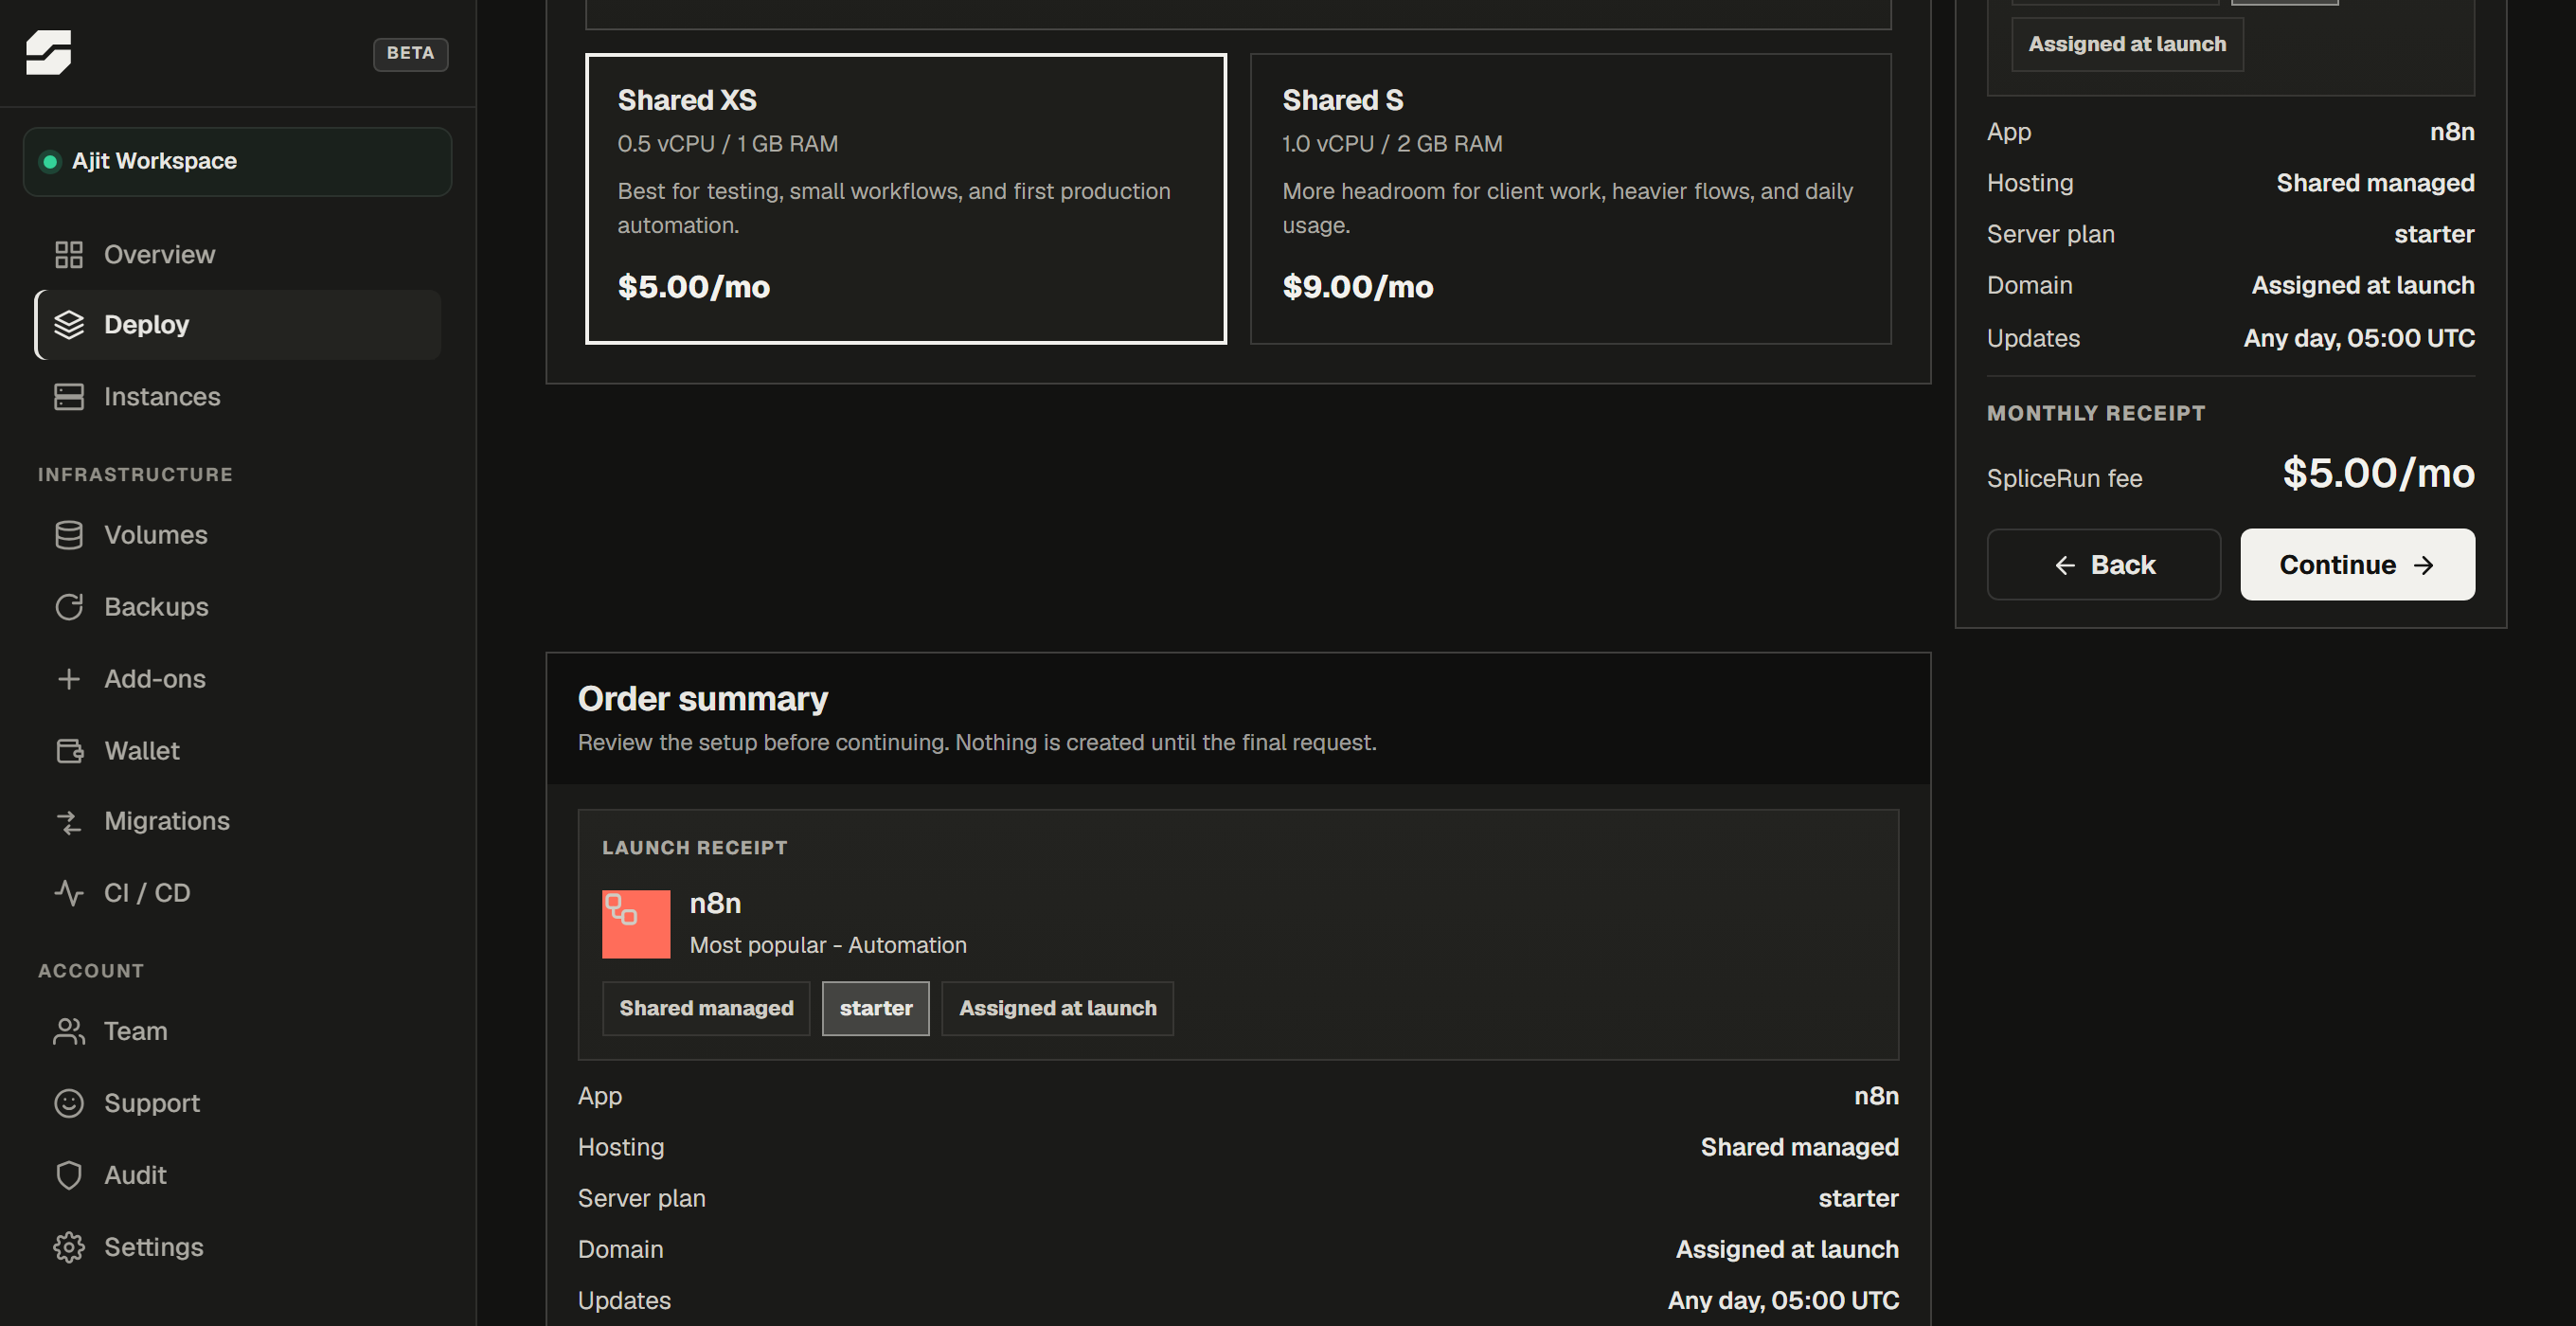
Continue stays greyed out until you have picked both the hosting style and a size - that is the step people get stuck on.
- Provisioning is automatic. Watch the instance page - there is no fixed “ready in 2-3 minutes” promise; load, queue depth and image pulls vary.
- When the status is live, open the instance URL. There is no email with admin credentials. The first person to complete signup in the app becomes the owner (we seed that path so the instance is not left unclaimed).
- Build workflows. OS security patching, HTTPS and backups are on us - see What we manage.
Full Shared onboarding: Shared hosting.
Dedicated (we buy the server for you)
- Have a domain or subdomain ready (A record will point at the server IP we show you after provision).
- Deploy Dedicated, choose size/provider options offered at checkout, pay.
- We create and harden the VPS, install the stack, and attach TLS when DNS is correct. Timing depends on the provider - watch the instance page, not a marketing estimate.
- Claim the app owner the same way as Shared: open the URL and complete first signup when prompted. No separate “password by email”.
Full Dedicated onboarding: Dedicated server.
Bring your own server
You need the VPS and the domain before you start - including the DNS A record pointing at the server, because the HTTPS certificate cannot be issued without it.
You do not need our SSH key yet. It does not exist until you begin the setup: we generate a key pair for your instance and show you the public half, with a ready-made command to install it.
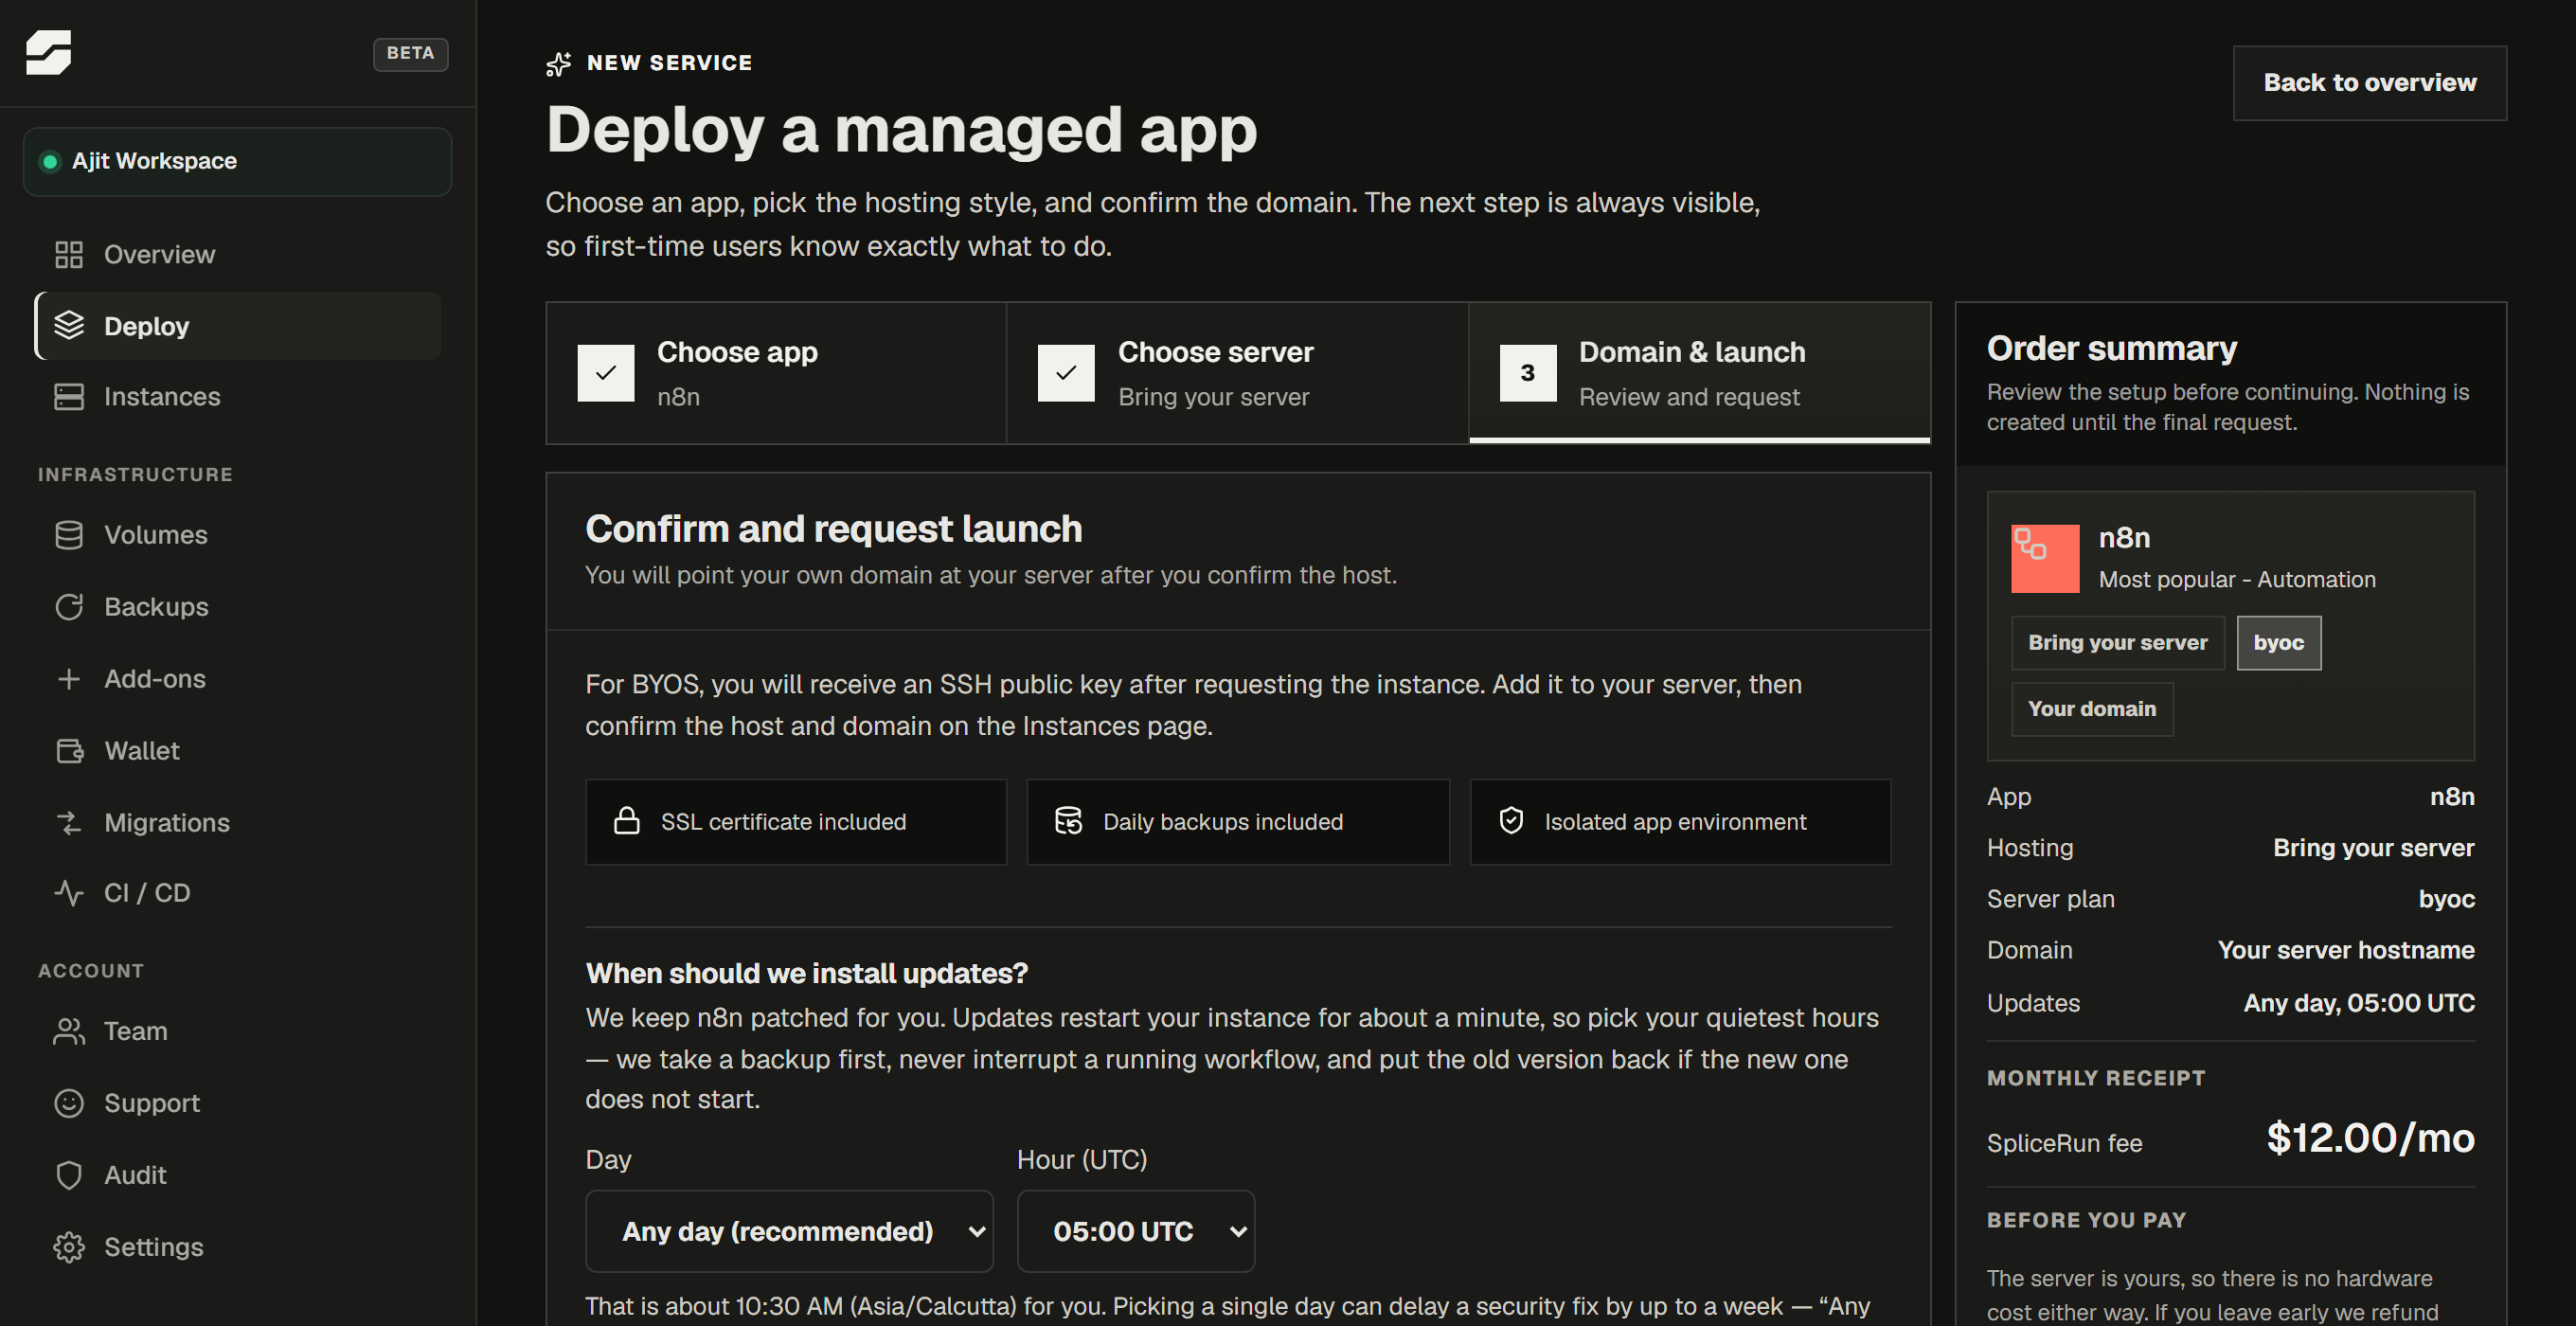
Spec, key install, preflight and post-setup are written in full here:
That guide is the product source of truth for BYOS (minimum 1 vCPU / 1 GB RAM / 10 GB free disk, Ubuntu 22.04/24.04 or Debian 12, ports 22/80/443, root or passwordless sudo).
First workflow (any lane)
Once the app is open and you are signed in as owner:
- Add a simple workflow (for example a webhook and a debug/log node).
- Execute it once from the editor.
- Activate it only when you are happy with the result.
Next steps
Need help? Contact support